Okay, this post is going to tell you a lot about me. "What" about me...well, I'll let you decide.
 |
| Keep reading to learn about these beauties. |
So, we have this lovely counter...
 |
| It's much MORE lovely now that the cupboards are down and the wall color is being changed. But more on THAT later. |
And I am so excited to be able to sit at it and eat my breakfast; have friends sit at it while I cook...you get the idea. We currently have no dining room chairs, much less stools to sit at this lovely counter. So, I went looking at thrift stores. And looking, and looking, and looking. I finally found these two chairs. Andy was so disgusted by them that he only agreed to take them home if I promised to have the stained material off of them by the time he got back from a football game he was watching.
 |
| See, they don't look so bad. |
 |
| And at this price how could I resist? |
That was no problem! I quickly agreed.
Here's what I did:
 |
| They really were pretty bad. There was no thought of salvaging the canvas that covered the seats. |
 |
| I removed all these staples, and easily took off the canvas. |
 |
| Which revealed foam covered |
 |
| particle board seats. I unscrewed those (thanks to my handy dandy drill). |
 |
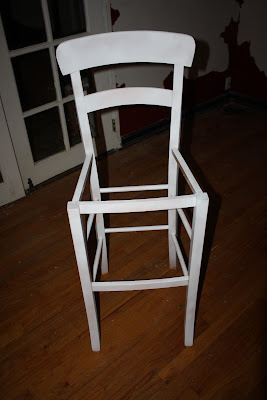
| Primed the frame. |
 |
| Using Rust-Oleum Primer. I love this stuff! I loved that I could spray it, and I loved that I didn't need to sand the frame before I primed it. |
 |
| I cut out the material that I got at Joanne's, in the home decorating department. Off the Clearance Rack (bonus points to Karlie). HMS "Fun Foliage" Home Seasons Up. |
I layed the material down, wrong side up, placed the foam in the center of it, and the particle board (bottom side up) to top it all off. Then I staple gunned (I'm not actually sure that that is a word) the corners onto the underside of the particle board.
 |
| Next step, a LARGE amount of staples to keep it all secure. It doesn't look very pretty on the underside... |
 |
| but I'm pleased with the cushions from a bird's eye view :). |
Now, all of that happened in a few hours (after a trip to Joanne's for the material, the staple gun, staples and primer). And then the poor stools waited and waited for me to get the supplies together to paint the frame.
I found a tutorial here on how to make and use chalkpaint (not to be confused with chalkboard paint, as in my awesome refrigerator). So I followed the instructions. I love it when that works!
 |
| I chose to use some of the leftover paint from my kitchen, so this really was a cheap and easy job. |
So, victory and success right? No. I came home after Thanksgiving (yes, that is how long ago this began) and could not for the life of me find the 8 screws I had set aside with my drill to complete this project.
No problem, I went to my box of screws confident to find just what I needed. No.
So, last week (that's about 6 weeks later) I went to hang up the curtains in my bedroom and found the 8 screws! Yay! It took me 5 minutes to finish this 2 month project :).
 |
| Nice, right? |
Now, you are probably wondering why they are sitting against a wall, instead of nestled under my counter. Are you?
I am.
I'll tell you.
I forgot to measure how high they are.
That's right, I never checked to make sure they would fit under the counter.
Sigh.
So now I have to wait until I can find somewhere to cut them.
Because there is no way I trust myself to cut them even.
And who wants to sit on a stool and feel like you're at sea?
Not me.
Sigh.
So, that's a little bit about me and a lot about my $5 stools. :)
KTV
These are beautiful!! Excellent job, Karlie. (I like chalk paint, too.)
ReplyDeleteDespite being too tall, they're lovely! I love the fabric.
ReplyDelete